Short answer: To meal prep healthy lunches for the week, start by choosing 2-3 versatile recipes, shop for ingredients on the weekend, and batch-cook components like grains, proteins, and veggies. Store in portioned containers for grab-and-go lunches that stay fresh from Monday to Friday.
Key takeaways
- Plan 2-3 recipes with overlapping ingredients to reduce waste.
- Batch-cook grains, proteins, and veggies separately for flexibility.
- Use airtight containers to keep lunches fresh for up to 5 days.
- Prep on Sunday or a day you have 1-2 hours of free time.
- Include a mix of colors and textures for satisfying meals.
- Label containers with day of the week to stay organized.
What you will find here
- Why Meal Prep Healthy Lunches?
- Step 1: Choose Your Recipes Wisely
- Step 2: Build a Smart Shopping List
- Step 3: Set Up Your Prep Session
- Step 4: Assemble and Store Properly
- Step 5: Reheat and Enjoy Without the Fuss
- Common Mistakes and How to Avoid Them
- How to Keep Your Meals Fresh Longer
- How to Adapt Meal Prep for Dietary Restrictions
Meal prepping healthy lunches for the week doesn’t have to be complicated or time-consuming. With a little planning and a few smart strategies, you can set yourself up for five days of nutritious, delicious lunches that keep you energized and satisfied. This guide walks you through every step, from choosing recipes to storing your meals, so you can save time and eat well without the daily stress of ‘What’s for lunch?’
Why Meal Prep Healthy Lunches?
When you prep lunches ahead of time, you remove the midday decision fatigue. You’re less likely to grab something processed or skip lunch entirely. Many people who meal prep eat healthier compared to those who don’t. The logic holds: having a ready-to-eat healthy option means you’ll eat it.
Meal prepping also saves money. Buying ingredients in bulk and cooking at home costs less than daily takeout. And it frees up mental energy. You don’t have to think about lunch each morning — just grab and go.
If you’re new to meal prep, start simple. You don’t need to cook every single component from scratch. Use shortcuts like pre-washed greens, canned beans, and rotisserie chicken to speed things up.
Step 1: Choose Your Recipes Wisely
The key to successful meal prep is picking recipes that are both healthy and hold up well in the fridge. Avoid meals that get soggy or lose texture, like delicate salads with thin dressing or crispy fried foods. Instead, focus on sturdy ingredients that taste better after a day or two.
What Makes a Good Meal Prep Lunch?
- Stable vegetables: Roasted broccoli, bell peppers, carrots, and sweet potatoes stay firm. Leafy greens should be stored separately and added just before eating.
- Grains that reheat well: Quinoa, brown rice, farro, and barley all hold their texture. White rice works too, but it can dry out slightly.
- Proteins that stay moist: Chicken thighs, chickpeas, lentils, and tofu are forgiving. Lean chicken breast can dry out, so consider shredding it or cooking it in a sauce.
- Acidic dressings and sauces: Vinaigrettes with vinegar or citrus keep well. Creamy dressings may separate; store them separately and add at serving.
Here are three foolproof recipes to rotate:
| Recipe | Key Ingredients | Storage Tip |
|---|---|---|
| Mediterranean Grain Bowls | Quinoa, chickpeas, cherry tomatoes, cucumber, feta, olives, lemon vinaigrette | Store dressing separately; add fresh herbs before eating. |
| Chicken & Veggie Stir-Fry | Chicken thigh, broccoli, bell peppers, snap peas, brown rice, soy-ginger sauce | Keep sauce on the side if using a lot; reheat in microwave 2 minutes. |
| Black Bean Tacos (deconstructed) | Black beans, corn, bell pepper, avocado (add day-of), salsa, tortillas | Store tortillas separately; warm before eating. |
Pick two or three recipes for the week. You don’t need five different lunches — repeating is fine and actually easier.
Step 2: Build a Smart Shopping List
Once you’ve chosen your recipes, write one list that covers all ingredients. Group them by store section: produce, protein, grains, pantry, and dairy/alternatives. Check what you already have at home to avoid buying duplicates.
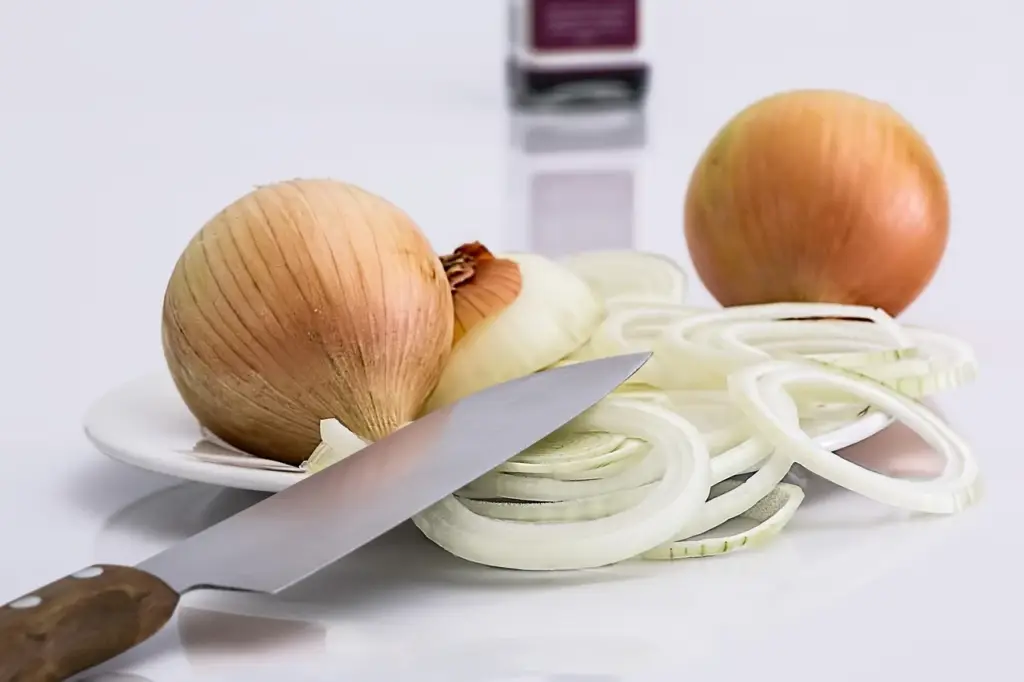
Think about overlapping ingredients. For example, if both the grain bowl and stir-fry use bell peppers and onions, you only need to buy them once. This reduces waste and saves money.
Here’s a sample shopping list for the three recipes above:
- Produce: broccoli (2 crowns), bell peppers (3-4 assorted), cherry tomatoes (1 pint), cucumber (1), onion (1 large), garlic (1 head), snap peas (1 bag), cilantro (1 bunch), lemon (2), avocado (2-3, buy firm if prepping early)
- Protein: chicken thighs (1.5 lbs), canned chickpeas (1 can), canned black beans (1 can)
- Grains: quinoa (1 cup), brown rice (1 cup)
- Pantry: olive oil, red wine vinegar, soy sauce, cumin, chili powder, salsa (1 jar), corn (1 can or frozen)
- Dairy: feta cheese (small block), optional Greek yogurt for topping
- Other: tortillas (6 pack), olives (small jar)
Shop once on the weekend. This is the single most time-saving step in meal prep.
Step 3: Set Up Your Prep Session
Dedicate one to two hours on a Sunday or a day you have free. Start by washing and chopping all vegetables. Store them in separate airtight containers or zipper bags. For example, keep chopped bell peppers in one bag, broccoli florets in another.
Cook your grains in a large batch. Quinoa and brown rice both take about 15-20 minutes. You can cook them together if you’re comfortable, but separate pots are easier for different grain types.
Cook your proteins. For chicken thighs, bake them at 400°F (200°C) for 25-30 minutes with salt, pepper, and olive oil. Let them cool before slicing or shredding. For beans, simply drain and rinse canned ones — no cooking needed unless you’re starting from dried.
Make one or two dressings or sauces. A simple lemon vinaigrette (olive oil, lemon juice, salt, pepper) works for many bowls. Store in a jar and shake before use.
If you like a little variety, prep components separately rather than fully assembled meals. This “ingredient prep” approach lets you mix and match throughout the week, so you never get bored.
Step 4: Assemble and Store Properly
Now it’s time to portion everything into containers. Use glass or BPA-free plastic containers with tight lids. Divide equally based on the number of lunches you need. Typically, you’ll make 4-5 containers for Monday through Friday.
Layer ingredients thoughtfully. Place grains at the bottom. Add protein and sturdy vegetables on top. If you’re using leafy greens or avocado, store them separately and add the morning of. Sauces and dressings should be in small separate containers to prevent sogginess.
Label each container with the day of the week. This helps you rotate freshness — eat meals with delicate ingredients (like avocado) earlier in the week and heartier meals later.
Refrigerate all lunches immediately. They’ll stay fresh for 3-4 days for most ingredients, and up to 5 days for sturdy ones like cooked grains and chicken.
If you want to prep for two weeks, you can freeze some meals. Freezer-friendly options include chili, soups, and stews. Cooked grains also freeze well — just let them cool completely before freezing in a sealed bag.
Step 5: Reheat and Enjoy Without the Fuss
In the morning, grab your container (plus any add-ins) and head out. If your workplace has a microwave, simply reheat for 2-3 minutes for a hot lunch. For cold lunches like grain bowls with fresh veggies, no reheating is needed.
To keep your food safe, don’t leave it at room temperature for more than 2 hours. If you don’t have access to a fridge at work, use an insulated lunch bag with an ice pack.
If you get bored of the same meal by Wednesday, try small changes. Add a different hot sauce, swap the dressing, or toss in some nuts or seeds for crunch. Small tweaks keep lunch interesting.
Common Mistakes and How to Avoid Them
Even experienced meal preppers hit snags. Here’s what to watch out for:
- Overcooking vegetables. Roast or steam them until just tender. They’ll soften a bit in the fridge, so undercook slightly.
- Using too much liquid. Soups and stews are fine, but watery vegetables like zucchini can make meals soggy. Pat them dry after cooking.
- Forgetting to cool food before storing. Hot food raises the fridge temperature and creates condensation. Let everything cool to room temperature before sealing.
- Making too many different meals. Stick to 2-3 recipes. More variety means more ingredients and more time.
- Not eating leftovers. If you prep for Monday through Friday, eat them in order. Don’t skip a day, or you’ll waste food.
If you want to explore more lunch ideas, check out our post on Hello world! for additional recipes.
How to Keep Your Meals Fresh Longer
Proper storage is key to extending the life of your prepped meals. One common mistake is packing foods while they’re still warm. Let everything cool to room temperature before sealing containers. Otherwise, condensation builds up inside, making vegetables soggy and promoting bacterial growth.
Use airtight containers that are the right size for each portion. Too much air space accelerates spoilage. Glass containers are great because they don’t absorb odors and last longer than plastic. If you use plastic, choose ones labeled BPA-free and avoid heating them in the microwave if they’re not rated for it.
Consider vacuum sealing for extra longevity. If you have a vacuum sealer, it can keep ingredients like cooked grains and roasted vegetables fresh for up to 10 days in the fridge. For most people, a good seal with a regular container is enough for 4-5 days.
Another tip: store leafy greens and fresh herbs with a dry paper towel to absorb excess moisture. Change the towel every couple of days to keep them crisp. This works especially well for spinach, arugula, and mint.
How to Adapt Meal Prep for Dietary Restrictions
Meal prep is flexible and can be adjusted to fit common dietary needs. If you’re vegetarian or vegan, focus on beans, lentils, tofu, and tempeh for protein. Grains and roasted vegetables form the base. Add nuts, seeds, and avocado for healthy fats.
For gluten-free diets, stick to naturally gluten-free grains like quinoa, rice, amaranth, and buckwheat. Avoid soy sauce unless it’s labeled gluten-free; tamari is a good alternative. Check labels on dressings and canned goods.
If you’re dairy-free, skip cheese and creamy dressings. Use olive oil, tahini, or avocado-based dressings instead. Coconut yogurt can replace Greek yogurt in toppings.
For low-carb or keto meals, replace grains with cauliflower rice or zucchini noodles. Increase portion sizes of protein and low-carb vegetables like broccoli, spinach, and bell peppers. Add healthy fats from olive oil, avocado, and nuts.
The key is to start with your favorite recipes and substitute ingredients one at a time. Don’t try to overhaul everything at once — you’ll burn out. Make one change per week and see how it works for you.
Frequently asked questions
How long do meal prepped lunches last in the fridge?
Most meal prepped lunches stay fresh for 3 to 4 days in the refrigerator. Sturdier ingredients like cooked grains, roasted vegetables, and proteins like chicken or beans can last up to 5 days. Always store food in airtight containers and check for off smells or textures before eating.
Can I meal prep if I don’t have a microwave at work?
Yes. Focus on cold lunch options like grain bowls, salads, wraps, and sandwiches. Store dressing separately and add it just before eating. Use an insulated lunch bag with an ice pack to keep perishable foods safe if refrigeration isn’t available.
What are the best containers for meal prep?
Look for glass or BPA-free plastic containers with airtight lids. Glass is durable and doesn’t stain, but it’s heavier. Plastic is lightweight and often microwave-safe. Choose containers with multiple compartments to keep different foods separate, or use small sauce containers for dressings.
How do I keep my lunches from getting soggy?
Store wet ingredients like dressings, sauces, and juicy vegetables (tomatoes, avocado) separately from dry ingredients like grains and greens. Add them right before eating. Also, avoid overcooking vegetables; they release less moisture when slightly underdone.
Is it safe to freeze meal prepped lunches?
Yes, many meal prepped lunches freeze well. Soups, stews, chili, cooked grains, and marinated proteins are great candidates. Avoid freezing watery vegetables like cucumber or lettuce. Thaw frozen meals in the fridge overnight and reheat thoroughly before eating.
2 thoughts on “Meal Prep Healthy Lunches for the Week: A Step-by-Step Guide”