Short answer: To meal prep healthy lunches for the week, choose 2-3 versatile recipes, shop for ingredients in bulk, cook in batches on one day, portion into containers, and store in the fridge or freezer. Focus on balanced meals with protein, fiber, and healthy fats.
Key takeaways
- Plan 2-3 recipes that use overlapping ingredients to reduce waste.
- Cook grains, proteins, and vegetables in separate batches.
- Use airtight containers to keep lunches fresh for 4-5 days.
- Freeze portions you won’t eat within 3 days.
- Prep reusable containers and utensils ahead of time.
What you will find here
- Why Meal Prep Healthy Lunches?
- Step 1: Plan Your Meals and Make a List
- Step 2: Shop Strategically
- Step 3: Set Up Your Kitchen for Success
- Step 4: Cook in Batches
- Step 5: Assemble and Store
- Common Mistakes and How to Avoid Them
- How to Reheat Your Meals Without Ruining Them
- How to Adapt Meal Prep for Different Diets
- Making It a Habit
Meal prepping healthy lunches for the week saves you time, money, and decision fatigue. Instead of scrambling each morning or buying expensive takeout, you can grab a balanced, homemade meal from your fridge. The key is to build a system that works for your schedule and tastes. Here’s how to do it without turning your Sunday into a marathon cooking session.
Why Meal Prep Healthy Lunches?
When you prep lunches ahead, you control the ingredients and portions. That means less salt, sugar, and unhealthy fats than most restaurant or pre-packaged meals. You also save time: one focused session in the kitchen can cover five days of lunches. And you save money, because buying in bulk and cooking from scratch costs less than daily takeout.
The trade-off is that you need to plan and set aside two to three hours once a week. But for most people, that investment pays off in saved time and better health the rest of the week.
Step 1: Plan Your Meals and Make a List
Start by choosing two to three lunch recipes for the week. Stick with recipes that share ingredients, so you can buy and prep efficiently. For example, roasted chicken, black beans, and quinoa can become a bowl, a wrap, or a salad depending on what you add.
Write a grocery list organized by store section. Include staples like olive oil, salt, and spices you already have. Check your pantry before you go to avoid buying duplicates.
Sample Healthy Lunch Recipes for Prep
- Quinoa burrito bowls: Quinoa, black beans, roasted bell peppers, corn, and avocado (add avocado day-of).
- Chicken and vegetable stir-fry: Brown rice, grilled chicken, broccoli, and snap peas with a soy-ginger sauce.
- Mediterranean chickpea salad: Chickpeas, cucumber, tomatoes, red onion, feta, and a lemon-tahini dressing.
Rotate these every week to keep things interesting. As you get comfortable, you can try new recipes or adjust them based on seasonal produce.
Step 2: Shop Strategically
Go to the store with your list and stick to it. Buy some items frozen, like broccoli, edamame, or berries, which are just as nutritious as fresh and last longer. Fresh vegetables that hold up well, like carrots, bell peppers, and cabbage, are better for meal prep than delicate greens that wilt.
Buy meat in family-sized packages and split them between meals. For example, a pack of chicken thighs can be used for Monday’s lunch and Tuesday’s dinner if you cook them all at once.
Step 3: Set Up Your Kitchen for Success
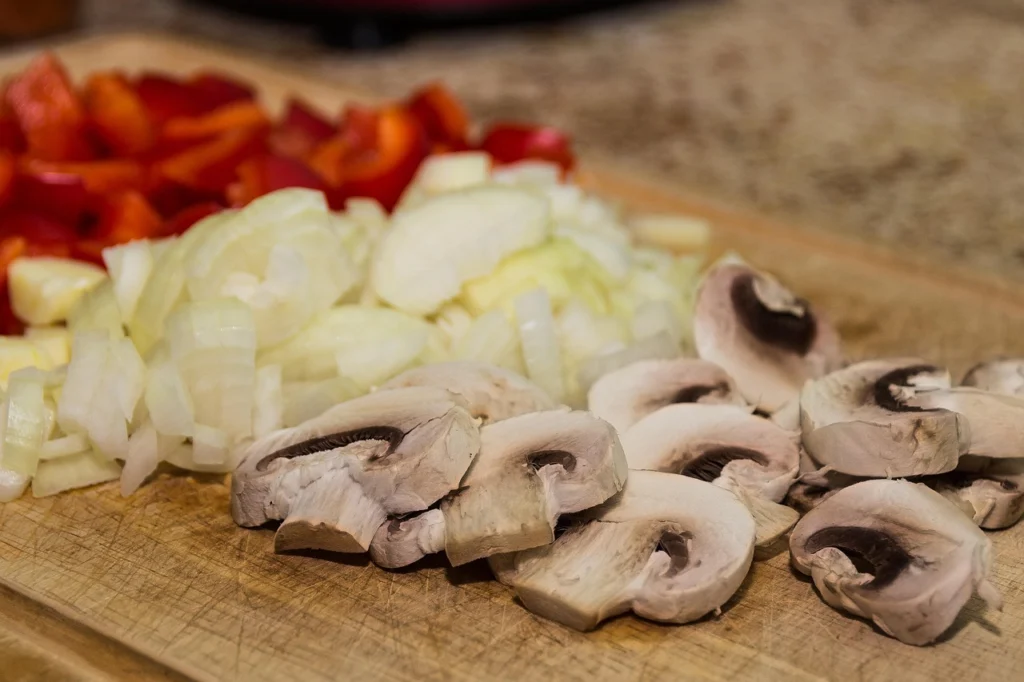
Before you start cooking, wash and dry your produce. Chop onions, garlic, and hardy vegetables. Portion out spices into small bowls if a recipe needs several. Line baking sheets with parchment for easy cleanup. This mise en place approach makes the actual cooking go faster.
Make sure you have enough storage containers. Glass containers with snap-lock lids are best because they don’t stain, they microwave safely, and they stack neatly. You’ll need at least five lids and bases for lunches. If you plan to freeze some, use containers labeled freezer-safe.
Step 4: Cook in Batches
Cook your grains, proteins, and vegetables separately. This lets you mix and match so that no two lunches need to be exactly the same. Here’s a practical order:
- Start grains that take longest: Brown rice, quinoa, farro, or barley. Rinse them, then cook in a pot or rice cooker. Set a timer.
- Season and roast proteins: Chicken breasts, thighs, fish fillets, or tofu. Use simple seasoning—salt, pepper, olive oil, maybe a spice blend. Roast at 400°F (200°C) until cooked through.
- Roast or steam vegetables: On the same sheet pan or a separate one. Chop into uniform sizes and toss with oil and salt. Cook until tender but not mushy.
- Prepare fresh components: While everything cooks, wash lettuce, chop fresh herbs, or make a vinaigrette.
Let everything cool completely before assembling meals. Hot food in containers creates steam that makes your lunches soggy and spoils faster.
Step 5: Assemble and Store
Once food is cool, assemble each lunch container. Divide grains, protein, and vegetables equally. Keep wet ingredients like dressings, salsa, or avocado separate until you eat them. Put dressings in small leakproof cups or use the corner of the container if it has compartments.
If you’re prepping for five days, store the first two or three days in the refrigerator and freeze the rest. Frozen lunches can be thawed overnight in the fridge. Most meals stay good in the fridge for four days. After that, quality declines.
Storage Tips for Freshness
- Use airtight containers to keep air out.
- Store leafy greens and herbs separately with a paper towel to absorb moisture.
- Label containers with the date and contents so you know what to eat first.
- Place older containers at the front of the fridge as a reminder.
Common Mistakes and How to Avoid Them
Overcooking vegetables. Roast or steam them just until crisp-tender. They’ll finish softening when you reheat.
Using too similar recipes. If every meal is the same, you’ll get bored. Pick two to three flavor profiles, like Mexican, Asian, and Mediterranean, so you have variety.
Not accounting for the weekend. If you prep on Sunday, the food for Friday might be less fresh. Freeze Thursday’s and Friday’s portions, or prep enough for Monday through Thursday and make something quick on Friday.
How to Reheat Your Meals Without Ruining Them
Reheating can make or break a prepped lunch. Microwaves work fine, but you need to do it right. Remove the lid or open a steam vent. If your meal has rice or grains, sprinkle a few drops of water over them before heating to add moisture back. Heat in 30-second bursts, stirring between intervals, until hot throughout.
For grain bowls with fresh elements like avocado or greens, add those after reheating. For stir-fries or roasted vegetables, reheat in a skillet with a splash of water or broth over medium heat. This restores texture better than a microwave. If you meal prep with soups or stews, they reheat beautifully in a pot or microwave.
Tofu can get rubbery if overheated. Reheat it gently, just until warm. Fish also benefits from low-power reheating or being eaten cold over a salad.
How to Adapt Meal Prep for Different Diets
The system works for nearly any eating style. If you’re vegetarian, swap meat for legumes, tofu, tempeh, or eggs. For a vegan diet, skip animal products and use beans, lentils, nuts, and seeds for protein. Gluten-free is straightforward: choose quinoa, rice, or gluten-free grains and check sauces for hidden wheat.
Low-carb or keto? Replace grains with extra non-starchy vegetables like zucchini noodles, cauliflower rice, or leafy greens. Increase healthy fats with avocado, olive oil, nuts, or full-fat dressing.
If you follow a specific plan like Whole30 or paleo, use compliant ingredients. The prep method stays the same: batch-cook proteins, vegetables, and sauces that fit your guidelines. Store them in containers and combine at mealtime.
One rule applies across all diets: keep cooked and raw ingredients separate until you eat. That way, you can reheat the cooked part and add fresh stuff cold. It also helps if someone in your household eats differently—you can prep base components everyone shares, then customize each plate.
Making It a Habit
Consistency matters more than perfection. If you miss a week, just start again the next. You can also prep components without full meals. Having cooked quinoa, chopped vegetables, and a cooked protein in the fridge makes assembly faster on any day.
Over time, you’ll learn what works for your taste and schedule. Maybe sheet pan meals are your go-to, or maybe you prefer one-pot dishes. Build on what feels easy. The goal is to make lunch a healthy, effortless part of your day.
For more tips on getting started with home cooking, check out our guide to basic kitchen skills. And if you need inspiration for your next meal prep round, explore our recipe collection for ideas that travel well.
Frequently asked questions
How long do meal prepped lunches last in the fridge?
Most meal prepped lunches stay fresh for 3 to 4 days in the refrigerator when stored in airtight containers. Freeze portions you won’t eat within that window. Leafy greens and delicate herbs should be kept separately and added just before eating.
Can I meal prep salads for the week?
Yes, but keep wet ingredients separate to avoid sogginess. Layer hearty vegetables, grains, and protein at the bottom, then add greens and dressing only when you’re ready to eat. Mason jar salads work well this way.
What are the best containers for meal prepping lunches?
Glass containers with snap-lock lids are a good choice. They are microwave-safe, don’t retain odors, and last a long time. Look for ones with dividers to keep foods separate. BPA-free plastic containers are lighter but may stain or warp over time.
How do I keep my meal prepped food from tasting bland?
Season generously while cooking, and add fresh elements like herbs, citrus juice, or a flavorful sauce right before eating. Using bold spices like cumin, smoked paprika, or chili flakes can also help keep flavors vibrant throughout the week.
Do I need to reheat meal prepped lunches?
Not always. Some meals, like grain bowls or salads, taste great cold. For dishes you want hot, reheat in the microwave or on the stovetop with a splash of water to prevent drying. Stir halfway through for even heating.
1 thought on “How to Meal Prep Healthy Lunches for the Week”