Short answer: Cook quinoa perfectly by rinsing it first, using a 2:1 water-to-quinoa ratio, simmering for 15 minutes, then letting it steam off the heat for 5 minutes before fluffing with a fork.
Key takeaways
- Rinse quinoa to remove bitter saponins.
- Use 2 cups liquid to 1 cup quinoa for fluffy grains.
- Simmer covered for 15 minutes, then rest 5 minutes.
- Fluff with a fork for perfect texture.
- Store cooked quinoa in the fridge for up to 5 days.
- Toast quinoa in oil before boiling for a nuttier flavor.
What you will find here
- What Is Quinoa and Why Cook It?
- Do You Really Need to Rinse Quinoa?
- The Perfect Quinoa-to-Water Ratio
- Step-by-Step: How to Cook Quinoa Perfectly
- Common Mistakes and How to Avoid Them
- How to Use Cooked Quinoa in Meal Prep
- How to Cook Quinoa in a Rice Cooker
- Flavor Variations
- How to Tell When Quinoa Is Done
- How to Fix Overcooked or Undercooked Quinoa
- Final Tips for Quinoa Success
Quinoa looks simple, but it’s easy to end up with a mushy or bitter mess. The good news? Once you know the steps, you’ll get perfect, fluffy quinoa every time. This guide walks you through the whole process, from rinsing to serving, with tips you can use right away.
What Is Quinoa and Why Cook It?
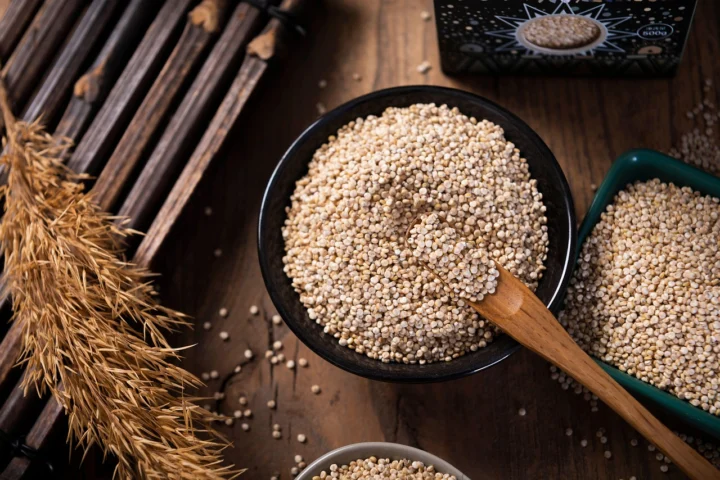
Quinoa is a seed that cooks like a grain. It’s packed with protein, fiber, and all nine essential amino acids, making it a complete plant protein. Many people use it as a base for bowls, salads, or side dishes. It has a mild, nutty flavor and a satisfyingly fluffy texture when cooked right.
Because quinoa is gluten-free, it works well for anyone avoiding gluten. You’ll often see white, red, and black varieties. White quinoa is the most common and cooks up fluffiest. Red and black quinoa hold their shape better, which is great for cold salads. If you’re new to quinoa, start with white. Once you’re comfortable, experiment with the other colors for different textures and slightly earthier flavors.
Do You Really Need to Rinse Quinoa?
Yes, rinsing is crucial. Quinoa has a natural coating called saponin that tastes bitter and soapy. Most brands pre-rinse, but it’s safer to rinse it yourself. Place the quinoa in a fine-mesh strainer and run cold water over it for about 30 seconds, stirring with your hand. You’ll see the water turn slightly cloudy. When it runs clear, you’re done.
Skipping the rinse often leads to bitter quinoa that ruins your dish. Even if the package says pre-rinsed, give it a quick rinse anyway. It takes only a minute and guarantees better flavor. If your strainer has large holes, line it with cheesecloth or use a coffee filter to prevent the tiny grains from falling through.
The Perfect Quinoa-to-Water Ratio
The standard ratio is 2 parts liquid to 1 part quinoa by volume. For most cooking, that means 2 cups of water or broth for every 1 cup of dry quinoa. This yields fluffy grains with a slight bite. If you prefer softer quinoa, add an extra tablespoon or two of liquid. For firmer quinoa, reduce liquid by a tablespoon.
Salt matters too. Add about 1/2 teaspoon of salt per cup of dry quinoa. Season the cooking liquid, not the cooked quinoa, for even distribution.
Using broth instead of water adds flavor. Vegetable, chicken, or even bone broth works. For a neutral base, stick with water. If you use salted broth, reduce the added salt to avoid over-seasoning.
Quick Reference Table
| Quinoa (dry) | Liquid | Salt | Cook Time |
|---|---|---|---|
| 1 cup | 2 cups | 1/2 tsp | 15 min |
| 2 cups | 4 cups | 1 tsp | 15-18 min |
| 1/2 cup | 1 cup | 1/4 tsp | 12-15 min |
Step-by-Step: How to Cook Quinoa Perfectly
- Rinse the quinoa in a fine-mesh strainer under cold water for 30 seconds.
- Toast (optional): Heat 1 teaspoon oil in a saucepan over medium heat. Add the quinoa and stir for 1-2 minutes until fragrant. This deepens the nutty flavor and helps prevent mushiness.
- Add liquid and salt: Pour in the water or broth and add salt. Stir once.
- Bring to a boil over high heat, then reduce to a low simmer. Cover the pot.
- Simmer for 15 minutes. Do not lift the lid. If using red or black quinoa, cook 2-3 minutes longer.
- Remove from heat and let stand, covered, for 5 minutes. This allows the steam to finish cooking the grains and makes them fluffy.
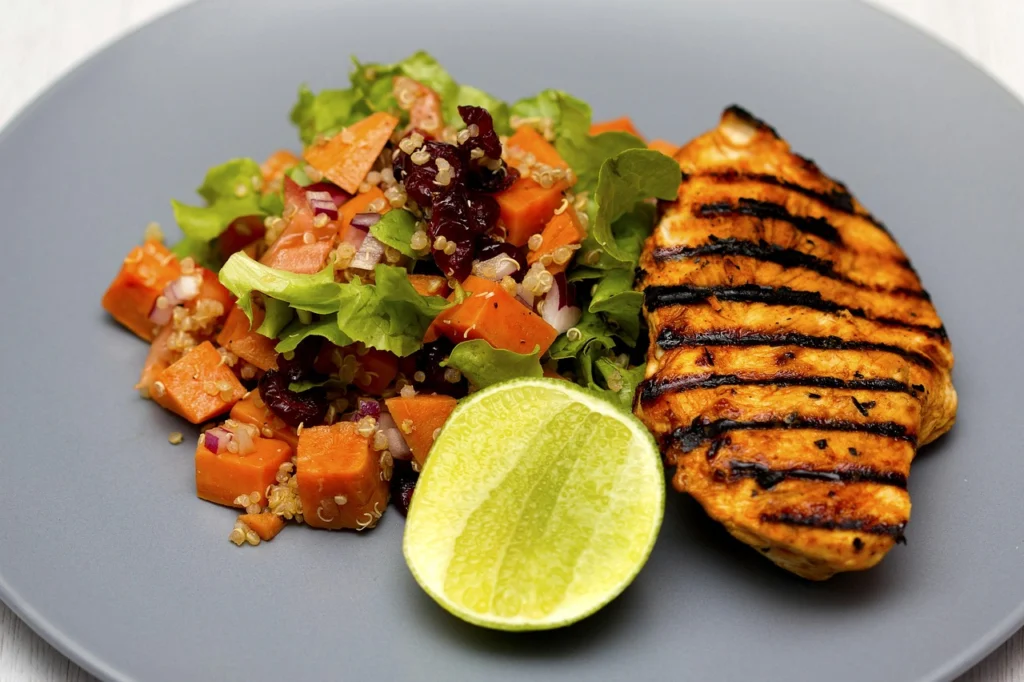
- Fluff with a fork. Gently stir to separate the grains. Serve immediately or cool for later use.
That’s it. The quinoa will be tender, fluffy, and not sticky. If it’s still crunchy, add a couple tablespoons of water and cook covered for another 2 minutes. If it’s mushy, you used too much liquid or cooked too long. Next time, reduce the liquid by a few tablespoons.
Common Mistakes and How to Avoid Them
Mushy quinoa usually means too much water or overcooking. Stick to the 2:1 ratio and the 15-minute simmer. Don’t stir the quinoa while it cooks, as that releases starch and makes it gluey. If your quinoa always turns out mushy, try reducing the liquid by 1/4 cup per cup of quinoa.
Bitter taste is almost always from unrinsed saponin. Rinse well before cooking. If you still get bitterness, you may have sensitive taste buds. Try toasting the quinoa before adding liquid—it can mask bitterness slightly.
Burned bottom can happen if the heat is too high or the pot too thin. Use a heavy-bottomed saucepan and keep the heat on low once it starts simmering. If you notice a burnt smell, immediately remove the pot from heat and transfer the quinoa to a new container, avoiding the scorched layer.
Undercooked quinoa (still crunchy) may be due to old quinoa or insufficient cooking time. After the 5-minute rest, check texture. If needed, steam it a few more minutes with the lid on. Also, check the expiration date on your package; old quinoa takes longer to cook and may never soften fully.
How to Use Cooked Quinoa in Meal Prep
Cooked quinoa keeps in the fridge for up to 5 days in an airtight container. For meal prep, cook a big batch on Sunday and use it all week. It’s great for cold salads, warm bowls, or even breakfast porridge with milk and fruit.
One cup of dry quinoa yields about 3 cups cooked. That’s enough for several meals. If you’re planning to meal prep healthy lunches for the week, quinoa is a perfect base. Check out our guide on Meal Prep Healthy Lunches for the Week: A Step-by-Step Guide for recipe ideas.
For a quick lunch, toss quinoa with canned beans, chopped veggies, a simple vinaigrette, and fresh herbs. It holds up well and tastes better the next day as flavors meld. To save time, cook quinoa alongside other grains or roast vegetables at the same time.
Freezing Quinoa
You can freeze cooked quinoa for up to 3 months. Let it cool completely, then spread in a single layer on a baking sheet. Freeze until firm, then transfer to a freezer bag. To use, thaw in the fridge or reheat directly from frozen in the microwave or a pan. Add a splash of water to prevent dryness.
How to Cook Quinoa in a Rice Cooker
A rice cooker makes quinoa even easier. Use the same 2:1 water-to-quinoa ratio. Rinse the quinoa, add it to the cooker with water and salt, then press the cook button. Most rice cookers automatically switch to warm when done. Let it sit on warm for 5 minutes, then fluff. You may need to adjust liquid slightly depending on your cooker, but start with the standard ratio.
Rice cooker quinoa tends to be slightly more tender than stovetop, but still good. Avoid opening the lid during cooking. If your rice cooker has a quinoa setting, use it—some models adjust time and temperature automatically. If not, the regular white rice setting works fine.
Flavor Variations
Once you master the basic method, try these simple add-ins during cooking:
- Cook in coconut milk mixed with water for a tropical twist.
- Add a bay leaf or a cinnamon stick to the cooking liquid for subtle flavor.
- Stir in a tablespoon of butter or olive oil after cooking for richness.
- Add lemon zest and fresh herbs like parsley or mint to the finished quinoa.
Quinoa is versatile. You can season it sweet or savory. For a breakfast quinoa, cook with milk, a pinch of salt, and a teaspoon of maple syrup. Top with berries and nuts for a filling start to the day.
If you’re looking for more meal prep inspiration, see How to Meal Prep Healthy Lunches for the Week for quinoa bowl ideas.
How to Tell When Quinoa Is Done
Perfectly cooked quinoa has a translucent appearance and a small white ring (the germ) visible around each grain. The texture should be tender but still retain a slight chew—like al dente pasta. Taste a few grains: if they are soft without being mushy, you’re good. Avoid relying solely on time, as altitude and pot type affect cooking speed. At higher altitudes, you may need an extra minute or two of simmering.
How to Fix Overcooked or Undercooked Quinoa
If your quinoa is undercooked (crunchy), add 2 tablespoons of water per cup of cooked quinoa, cover, and steam on low heat for 2 to 3 more minutes. Then let it rest off heat for 5 minutes before checking again. If it’s overcooked (mushy), spread it on a baking sheet and let it dry out in a low oven (around 300°F) for 5-10 minutes, stirring once. This won’t fix extreme mushiness, but can salvage slightly soggy quinoa for use in salads rather than sides.
Final Tips for Quinoa Success
Measure accurately. Volume is key. Don’t guess the water. Use a dry measuring cup for quinoa and a liquid measuring cup for water.
Let the quinoa rest after cooking. That 5 minutes off the heat makes a big difference. Don’t skip it.
Fluff with a fork, not a spoon. A fork separates the grains without mashing them.
Store leftover quinoa in a container with a tight lid. If it seems dry when reheating, add a splash of water and microwave covered.
Now you know how to cook quinoa perfectly. It takes a little practice, but you’ll get consistent results with this method.
Frequently asked questions
What is the correct quinoa to water ratio?
The correct ratio is 2 parts liquid to 1 part dry quinoa. For example, use 2 cups of water or broth for every 1 cup of quinoa. This ratio yields fluffy, tender grains. Adjust slightly for desired texture: add a tablespoon more liquid for softer quinoa, or reduce by a tablespoon for firmer.
How long do you need to soak quinoa before cooking?
You do not need to soak quinoa before cooking. Simply rinse it thoroughly under cold water to remove the bitter saponin coating. Soaking is not necessary and may actually make the grains too soft. If you prefer a softer texture, you can soak for up to 15 minutes, but it’s not recommended for fluffy results.
Can you cook quinoa without rinsing?
You can, but it’s not recommended. Unrinsed quinoa has a natural coating called saponin that tastes bitter and soapy. While some brands are pre-rinsed, rinsing yourself ensures no bitterness remains. If you choose not to rinse, the final dish may have an unpleasant aftertaste.
How do you store cooked quinoa?
Store cooked quinoa in an airtight container in the refrigerator for up to 5 days. For longer storage, freeze it for up to 3 months. To freeze, spread cooled quinoa on a baking sheet, freeze until solid, then transfer to a freezer bag. Thaw in the fridge or reheat directly from frozen.
Why is my quinoa mushy?
Mushy quinoa is usually caused by using too much water or cooking it too long. Stick to the 2:1 liquid-to-quinoa ratio. Cook for exactly 15 minutes, then let it rest off the heat for 5 minutes. Avoid stirring while it cooks, as that releases starch and makes it sticky.